How to Troubleshoot Transceiver and Switch Port Through Loopback Test?
Loopback
Loopback is a commonly used term in telecommunications. It refers to the process of transmitting electronic signals or digital data streams and returning to their sending point without any intentional processing or modification. Therefore, by comparing transmitting signals with the receiving signals, the loopback test is used to debug physical connection problems. But what a loopback test means for
Why Need Fiber Loopback Test?
To conduct a fiber loopback test, the communication devices will be involved, like the transceivers and the switch. As you know, the transceiver is the basic component of fiber optic communication network equipment. We can take the transceiver as a case. Conventionally, a transceiver has a transmitting port and a receiving port, in that way, the loopback test can be applied to test the ports to diagnose whether the transceiver is working well and the configuration of the switch is right. For its unique working mode, the test is a convenient way to maintain transceivers. In the next part, we will deliver how to do the fiber loopback test on the transceiver.
How to Conduct Loopback Test?
In this part, we will introduce two types of tests to troubleshoot transceiver and switch port: single-port test and dual-port test.
Tools You Need to Prepare
To perform tests, things you need to prepare are listed below:
- Transceivers (2pcs), such as 10G SFP+ SR transceiver.
- Simplex fiber cable (1 pc).
- Switch (1 pc), like
Cisco switch. - Duplex fiber cable (1 pc).
- Two loopback cables (optional), like LC or SC loopback cable. To know more about loopback cable, you can move to the article: What Is Loopback Cable And How to Use It?
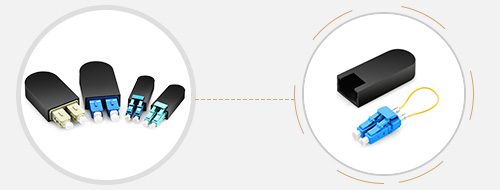
Figure 1: Loopback Cable
Loopback Test Steps
Single-port Loopback Test
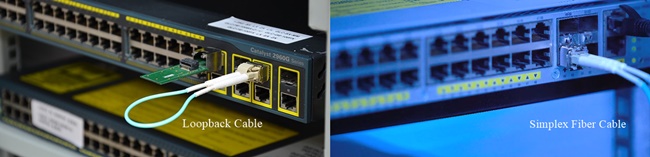
Figure 2: Single-port Loopback Test
1. Connect your transceiver with one simplex fiber cable or loopback
2. Check the software version of the switch.
3. Review the interfaces status to confirm the working status of all ports on the switch.

Figure 3: Display the Working Status of All Ports
4. Check the working status of the port you are connecting, such as the port 50 in the following figure.
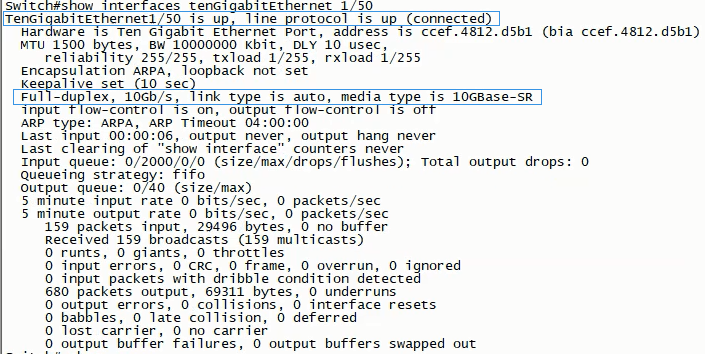
Figure 4: Working Status of Interface 50
5. Go over the DDM information to review whether the transceiver works in normal status.
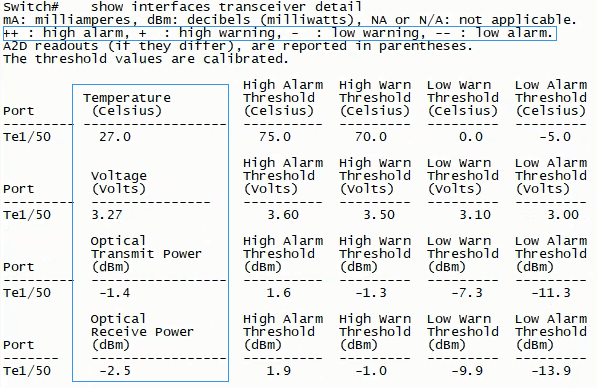
Figure 5: DDM Information of Port 50
Dual-port Loopback Test
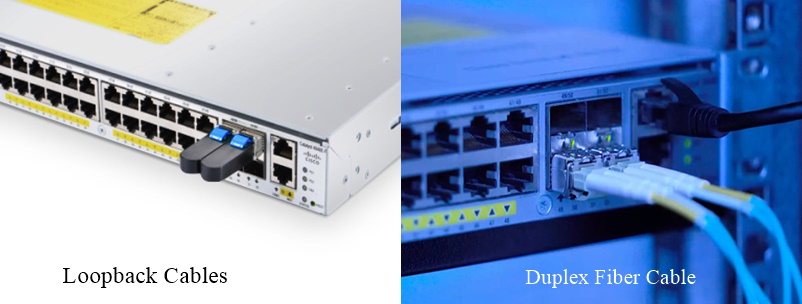
Figure 6: Dual-port Loopback Test
1. Connect two transceivers with one duplex fiber cable or two loopback cables. At this step, you can examine whether the port and transceiver data rate are matching as well as the link is normal or not.
2. Check the interfaces status to confirm the working status of all ports on the switch.
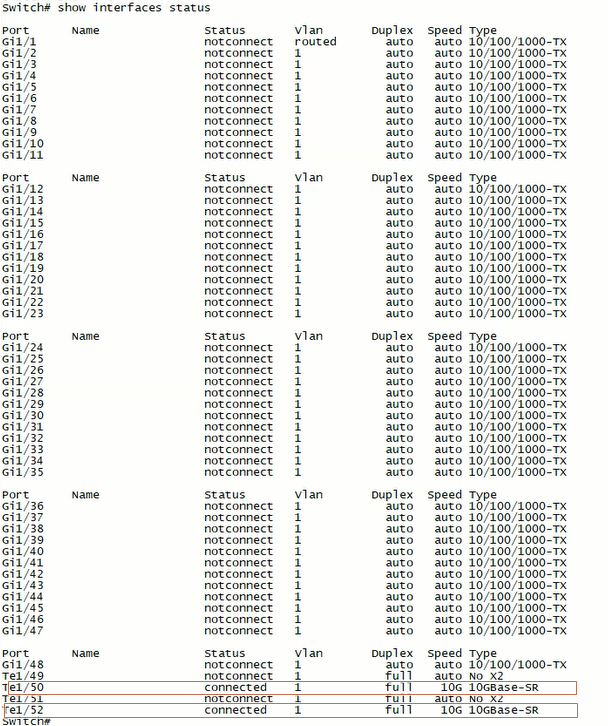
Figure 7: Ports Working Status Display
3. Check the working status of the two ports you are connecting, such as the ports 50 and 52 in the following figure.
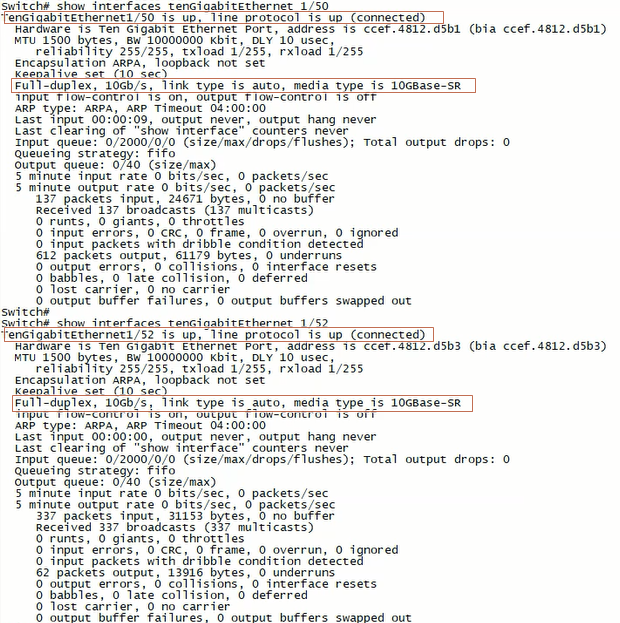
Figure 8: Working Status of Interfaces 50 and 52
4. Go over the DDM information to review whether the transceiver works in normal status.
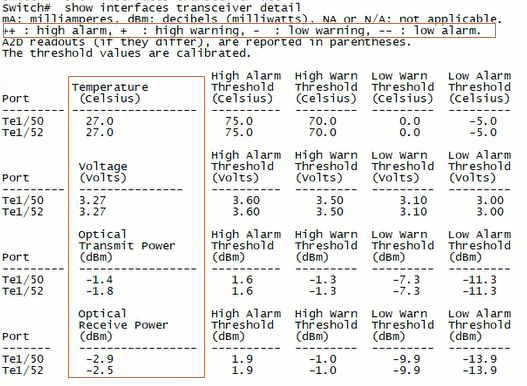
Figure 9: DDM Information of Ports 50 and 52
Summary
To troubleshoot the circuit connectivity as well as the transceiver and the switch port,